VS6 Installer was created after continuing, constant and complex research and testing in order to achieve the maximum results with minimum effort, removing or bypassing all the problems that are read frequently on forums by user frustrated and bitter because they can not, for example, to install VS 6.0 on Windows Vista or next (64bit).
Below you will find useful information to get the most from this program.
If you have questions, I recommend you first read the FAQ, after posta request to the VBCorner's FORUM.
Before you install Visual Basic 6.0, please read the topic Known Issues.
I recommend to set the ROOT folder, which is the main folder where the program will prepare three sub-folders necessary for installation.
I recommend NOT to create the ROOT folder manually, nor to choose an existing folder.
I recommend instead to create it directly through the VS6I Set Root folder button, to ensure that all the files and folders that will be processed by VS6I have the appropriate permissions.
Otherwise, you may receive errors during the installation.
This option allows you to have the program in any device, even USB, but to create the folders-preparation into another different device (network disk, local disk, and so on.).
If not set, then the root will be one of the program. This may not be the best solution because if you have the program into a USB device, then the folders preparation will be slower. Also, if you use the CD as the source, will be much slower.
Setting the root is highly recommended.
To set/change the ROOT folder:
File menu -> Set Root folder...
Auto-detect: if you choose an already existing 'previous prepared folder' as a ROOT folder, VS6I try to auto-detect the product to install.
I recommend to read: What is the fastest method for preparation of folders? (FAQ)
The program allows you to install Visual Basic 6.0 from both Visual Studio 6.0 (Enterprise or Professional) and Visual Basic 6.0 (Enterprise or Professional) editions.
Selected your product, before you perform Step 1.
Auto-detect: if you choose an already existing 'previous prepared folder' as a ROOT folder, VS6I try to auto-detect the product to install.
VS6 Installer needs to create three folders: one for Visual Studio/Basic, one for MSDN and one for Service Pack 6.
To create these folders you need to prepare:
1) the 1st original CD of Microsoft Visual Studio / Basic 6.0 (or equivalent copy)
2) the two original CDs of the MSDN Library (or equivalent copy) - optional but recommended
3) the files of Service Pack 6 - optional but recommended
It is not mandatory that the files are on CD, may be even on hard disk, USB key, ISO, etc..
What is important that their structure respects exactly that of the original CDs.
This is because VS6 Installer needs to create the three folders according to the building with the original files that are distributed by Microsoft on 5 CDs (while Visual Basic PRO should have only 3 CDs).
The creation of folders is done by clicking the three buttons:
Step 1 - prepare [product] folder
For Windows 10 v.1703 build 15063.138 + read this instructions before to proceed.
Select the path containing the files of CD #1 of Visual Studio/Basic 6.0 (CD/DVD/USB/Hard disk), select the folder from the Browse for folder window and press OK.
Begin preparing the folder by copying the files from source.
Note that the created folder name changes depending on the selected product:
- 1VS60 for Visual Studio 6.0 ENT or PRO version
- 1VB60 for Visual Basic 6.0
(Example, if you have a folder named 1VS60Ent mean that you have choose to prepare folder for Visual Studio 6.0 Enterprise edition)
So if you have both versions of Studio / Basic is possible to prepare a separate folder for each product.
Step 2 - prepare MSDN folder
Select the path containing the files of CD #1 of MSDN Library (CD/DVD/USB/ISO/Hard disk), select the root folder from the Browse for folder window and press OK.
Begin preparing the folder by copying the files from source.
When prompted, select the path of CD #2 of the MSDN Library (CD/DVD/USB/ISO/Hard disk) and continue the copy.
Created folder name will be 2MSDN60.
Step 3 - prepare SP6 folder
Select the path containing the files of Service Pack 6.0 (CD/DVD/USB/ISO/Hard disk), select the root folder from the Browse for folder window and press OK.
Begin preparing the folder by copying the files from source.
Created folder name will be 3SP6.
Important: if SP6 is a single EXE file, it must be unpacked into a folder before to do the Step 3.
After preparing the folders, you can begin installing Visual Studio/Basic 6.0, MSDN Library, and the Service Pack 6.
The installation of MSDN Library and/or Service Pack 6 are optional (though recommended).
Remember that both the installations of Visual Studio 6.0 and Service Pack 6 may require a reboot.
The button name changes depending on the chosen product.
Click on the "Install <your product name edition>" button to start the installation.
After this, the Visual Basic 6.0 setup.exe is starting.
Insert User and Company when prompted.
VS6I wizard already has selected/deselected the appropriate options:
• Microsoft Visual Basic 6.0
• ActiveX
• Disable Data Access (Windows 8.x and 10)
• Graphics (checked)
So you do not have to do anything.
Continue setup, and restart the computer, if required.
Please note that VS6 Installer also restart automatically. You do not have to restart it.
After the restart the setup re-run automatically:
will proposed to install MSDN, deselect this option (don't install MSDN) and finish up the installation without installing anything else.
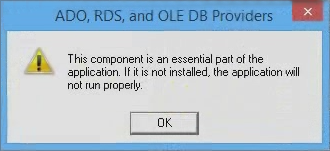
From Data Access main option, disable the item: ADO, RDS and OLE DB Providers () otherwise installation fails.
VS6 Installer 4 already contains the Disable Data Access option checked.
If you uncheck manually the above option and go manually, then do not worry about the message that appears (below), ADO will work.
Click on the "Install MSDN Library" button to start the installation.
When you are asked to choose the type of installation that you want, I recommend Complete.
Please note that there are different versions of MSDN Library composed of 1 or two discs.
However VS6I is able to understand it and will ask you for the second disk (or folder) only if necessary.
You will also notice that, regardless of the number of disks, you will not be prompted for any disk changes during installation.
This is because VS6I cleverly incorporates in a single 2MSDN60 folder.
Click on the "Install Service Pack 6" button to start the installation.
Restart may be required after installation.
This depends on the fact that in your system there are components to be updated that were in use at the time of the setup.
Under Windows Vista or Seven, after installation, to work properly, you need to set some properties of VB6.EXE, depending on the version of Windows:
Windows Vista / 7
- Set Disable desktop composition flag
Windows 8 / 10
Read issue #3 in Windows_10
Note that this options are available from VS6I, but in some cases may not work properly.